Author: Andrew

Stereo Microscope for Scrimshaw (and soldering)

Stereo Microscope for Scrimshaw (and soldering)

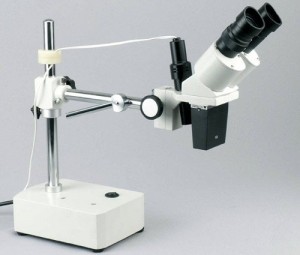
Stereo Microscope with a Boom Arm perect for scrimshaw
Stereo Microscope with a Boom Arm

This is a classic low-power microscope. The binocular 10X-20X stereo microscope on a boom-arm with a light gives clear sharp images. It’s widefield eyepieces, 45° inclined eye tubes and rubber eyeguards ensure an easy observation. The boom-arm stand allows you to turn the microscope head around two different axis (X and Z). This microscope offers high resolution, widefield of view and extremely large working distance (9″). The incident light shines down onto objects for the observation of surface details and fine scribing or stippling.

Available from Amazon.

Kraken Blog – Starting the Rigging and Shading

Kraken Blog – Starting the Rigging and Shading


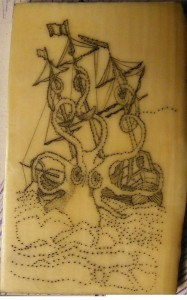
Late evening shot of the scrimshaw with "Squidward's" noggin having been shaded with stipple-dots.

Kraken scrimshaw-beginning rigging and shading the masts

Scrimshawing the details consists of choosing what to add, what to leave out and what to postpone ’til later.  The rigging seemed a good place to start this morning, with the exception of the “rat lines” (rope ladders, per http://phrontistery.info/nautical.html).  With much of the rigging and all the wrapped sails now complete, the shading of the masts pretty well in place, it’s time to start on Squidward.  Please note the difference in the color of the ivory is due to the lighting at the time – I am not “antiquing” the ivory. There’ll be several more pics on flikr, but for now I need to get to the store for more domestic endeavors.

Kraken Blog – Masts are up, Planks are Set

Kraken Blog – Masts are up, Planks are Set

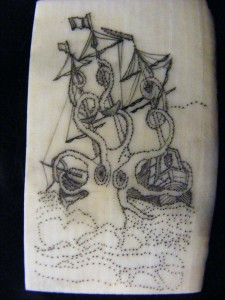
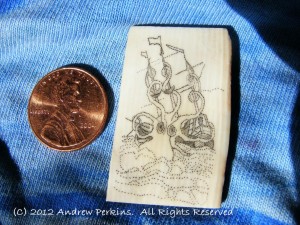
Scrimshaw of the Kraken as of 2012-04-15 Masts and planks completedA little time this morning to work on the Kraken, I am using a line technique on most of the ship, and staying with the stipple technique on “Oscar” – or whatever I decide to call him.  According to some legends the Kraken was either just a giant octopus or a cross between a squid and a crab.  Either way, you’d have to boil a lot of water to cook him.  Photographed here on the remnants of one of my favorite t-shirts (much to my wife’s satisfaction!) in the full sun. Since the garden awaits, I’ll be putting it away for awhile again, and tend to other matters. The scrimshaw artists page has been added and updated, please don’t be shy if you would like to be included here.

How To Scrimshaw-Excerpt from “Scrimshaw? But I Can’t Draw!”

Don’t Know Where to Start?


Scrimshaw? But I Can't Draw! Cover
For a limited time, we are including an excerpt from Chapter 5 of “Scrimshaw? But I Can’t Draw!” so you can start learning how to scrimshaw on any hard surface, including mammoth ivory, corian, acrylic – even a light switch cover!

——-

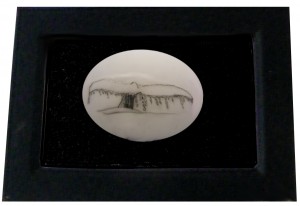
Scrimshaw of a Whale's tale breaking the surface of the water

You are going to learn one of several ways to transfer your artwork to your ivory or material of choice:


First things first:

  • You need your materials and your tools, including your scribe, a bright light, and some type of magnification
  • You need your ink or oil paint and rags
  • You need your eye protection and your dust mask (if you’re sanding down anything)
  • You need your Bees Wax or Renaissance Wax
  • You need your computer (or a copier that can reduce your picture/project of choice
  • And, Scotch tape


The first thing you will want to do is measure the piece you’re going to scribe, then create an image about ⅛” smaller all around, using your computer and a laser printer or an inkjet printer.  Many copiers will shrink images as well.  You won’t want your image to reach the edge, though you can get close.  If you are working with an oval, use your computer to draw an oval around the piece as well, so you will know that it is centered.


Right-Click on the image and select “Copy Link Address”. Open a new window and paste the link to get this image, then save the image to your computer so you can open it in your graphics program.

With this technique you will be copying the old whaleman’s way of creating scrimshaw. .

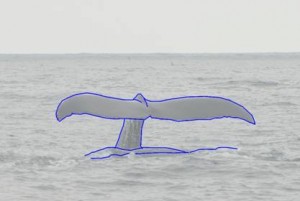
whale tale with image greyed out
Photo Credit: Jesse Wagstaff http://www.flickr.com/photos/jesse/3408218295/  Creative Commons Licence as of 2012 Used by permission


Cut out a copy of the image you wish to scrimshaw and leave ½” to 1” on all of the sides.  Carefully secure your material to your work surface, then secure the print over the top of your material, taping it so it will not shift as you move your work surface.  Be sure your work is aligned properly!


Scrimshaw of Williamsburg Congregational Church slightly off center

  I worked on a piece in 2010 for the Williamsburg Congregational Church’s annual craft fair, and once I’d finished the main work, found that I was about ten degrees off, as shown on the picture above. Looks like it’s going down a hill!  I kept this old one as a reminder to myself (shown at the beginning of the chapter), re-scrimshawed the church on a new piece of ivory after aligning the work properly. They raffled it off, and it drew quite a bit of interest.


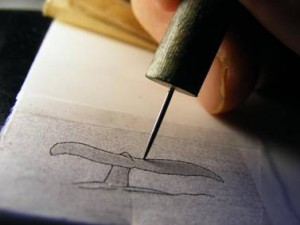
Press the point in as vertically as possible.  This will create the most consistent dot, an angled dot’s ink will wipe out of the indentation more or less, depending on the angle and the angle you wipe away the excess with, where a vertical dot will remain consistent.

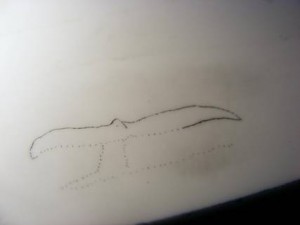
Piercing the paper through to the material below

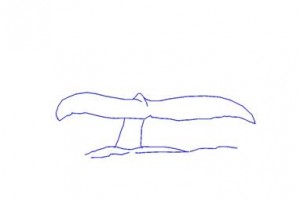
You will want to pierce the paper only along the prominent lines. This will be your “dot-to-dot” for creating your piece.  Here, The whale fluke from the previous chapter has been outlined and the actual picture faded using GIMP 2.6 (similar to PhotoShop).


Pierce along the lines about every 1/32″ (or 1mm) so you can visualize the fluke easily.  You may want to add the horizon line as well.

Now that you have finished creating the dots, remove the paper and inspect it under a bright light.  You should be able to see the indentations and see where you are going to scribe your lines.  Using a Q-Tip or a small brush, coat the ivory with ink or black oil paint and quickly wipe it off with a soft cloth (tissue may actually scratch it or leave lint, so the old t-shirt your spouse has been complaining about would be perfect!).  The dots should be visible enough that you can now place it under your magnification and begin carefully scribing the lines.

Inspecting the "stipple-dots"


Here, you are lightly scribing from one dot to the next.  Scribe enough so you can see the line when you wipe ink or oil paint onto it, then right off again (I am using oil paint, my preference changed to oil paint after an interview with Bob Hergert).

Scrimshaw from dot-to-dot in progress


Once you have finished scribing the lines, take a break, take a picture of it!  Thanks to digital cameras, you can document your work every step of the way.


Tip – if you are “checking your work” by repeatedly coating your ivory with ink to see where you’ve been, wipe it off immediately – don’t let it dry and then burnish it off.  Better yet, use a little bit of oil paint: it stays liquid longer and doesn’t dry to a hard finish for at least a week.


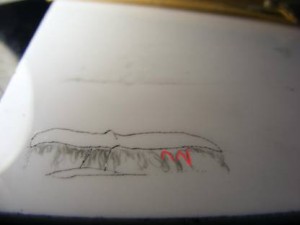
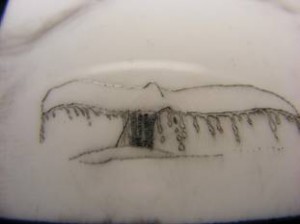
Adding water to the tailNow we come to decision time:  Do you want to add the water dripping off the back of the fluke, even if you can’t draw?  You can make “V” shapes and “\ /” shapes (open bottomed V’s), right?  Using a very soft lead pencil or colored pencil (as long as it’s soft lead), you can draw the water flowing off the tail of the whale by making these shapes across the bottom of the tail, varying the width between them.  Don’t worry, if you don’t like it, you can just wipe it off and start again.  Once the open V’s are drawn on, you can close them by adding a “U” to the bottom of them, making them bulge slightly in the middle, and adding a drop or two shaped like the letter “o” below them.  Use a pencil and see what you come up with either on your scrimshaw or on a separate piece of paper.
water action on the tail

This concludes the excerpts from Scrimshaw? But I Can’t Draw! Volume 1 – A Beginner’s Guide

Scrimspirations, easy to use templates are available through Etsy.com, including “Tall Ships and Sea Life”, “Mermaids and Monsters” and the popular “Scrimspirations, Book 1”.

For more images, try The Scrimshander’s Secret Scrapbook of Whaling Era Images available from Lulu.com!  If you’re looking for materials to scribe, go to our scrimshaw products page.

Mystery Artist #3 – initials MWB Found!  Thanks for writing, Mary

Mystery Artist #3 – initials MWB Found! Thanks for writing, Mary


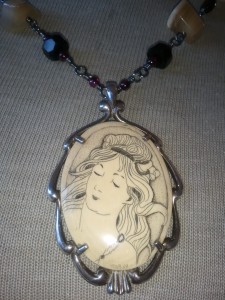
Portrait of Woman, Art Nouveau styleFrom Jenae – We don’t know much about “MWB” – they created this beautiful art nouveau jewelry in 1989, and that it appears to be held in a sterling silver frame.  Another beautiful piece, the owner would appreciate any information about the artist anyone may have.  Thanks!  Read the comment below to find out more!