Category: Tools

There are only a few tools you need to scrimshaw: a scribe, a strong light, and some magnification. The tools we’ve come across that work well are reviewed here.

Transferring an Image to Ivory – Graphite Paper

Graphite paper is similar to the old “carbon paper” they used to use back in the day.  A few sheets can go a long way, especially if you are doing small jewelry cabochons.

  1.  Simply cut out a piece and place it beneath the image you want to scribe, tape them both securely to the cab or other material.
  2. Using a mechanical pencil or ball point pen, trace over the images major lines firmly.
  3. Carefully remove the tape and the paper from the piece – the image should have appeared on your piece.  Using this method you don’t have to print out a reverse image since it will transfer the way you see it on the paper, unlike placing your image face down and trying to transfer it chemically.

You can find graphite paper at most big box office supply stores or at Amazon.com

Below you’ll see two different types – one is a sampler with four different colors and one is plain black.  I prefer the color since I can tell the difference easier if i do a scrim, fill repeat.  The yellow also works on dark ivory or horn.

Clicking on the image will bring you to the product on Amazon.com

“BradyBlock – An Excellent Tool for Engravers and Scrimshaw Artists

“BradyBlock – An Excellent Tool for Engravers and Scrimshaw Artists

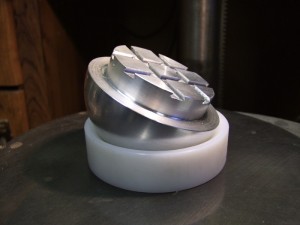
Brady Block (aka KleinBlock)The BradyBlock is a great tool for scrimshanders and engravers alike.  Allowing you to not only turn your piece 360 degrees, you can also tilt it easily getting the best angle without having to readjust your lighting.  Your piece is held by a piece of putty or other adhesive material that does not “give” too much, yet holds it firmly. The base is small and lightweight, and you don’t have to secure it to the table, although a small piece of non-slip material underneath it may be advantageous (experimenting will yield your best results).

Made in the USA by an artist/engraver that uses what he makes, this is a great tool for the serious artist.

Click on http://www.powleyengraving.com/profitcenter.htm and scroll down to find this and other offerings by Brian Powley.

See the Youtube video here:

Archival Wax

Archival Wax

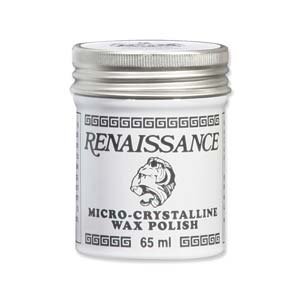
Renaissance Wax Cannister“…and coated with an archival wax…” So what is it? Archival wax is a preservative coating that protects an object from dust, dirt and fingerprints while allowing it to “breathe”.  Unlike a varnish, this type of coating does not seal the pores of wood or in our case ivory – not like a plastic coating anyway.  This fine wax coating penetrates the pores and protects the surface.  This is different from a plastic coating because it is so thin, fluctuations in barometric pressure will allow the gasses inside the pores to pass through the wax, whereas a plastic coating will inhibit this. You will also find that a varnish or urethane coating will eventually craze, archival wax will not.

“Renaissance Wax Polish will protect the surface of metals and wood from dust, fingerprints, liquids, and other environmental hazards. Renaissance wax polish was originally formulated in the British Museum research laboratories in the early 1950’s, in response to a discussion amongst museum technicians at an international conference on fine-art conservation. When applied, it creates a micro-thin, lustrous layer that enhances shine while preventing damage.”

I find this works very well as long as your piece is thoroughly dry – this is especially important when you are working with oil paint – the renaissance wax can dissolve and lift out any unhardened oil paint.  If you are working under a deadline, you may wish to use India ink as your medium since it dries much faster (hours instead of weeks).  India ink may also be helpful if you are creating scrimshaw while the customer waits – not my preferred method of scrimshaw, but not unheard of (I really don’t “pine for the good ol’ days” working in a kiosk in the mall!). Available at Amazon

Stereo Microscope for Scrimshaw (and soldering)

Stereo Microscope for Scrimshaw (and soldering)

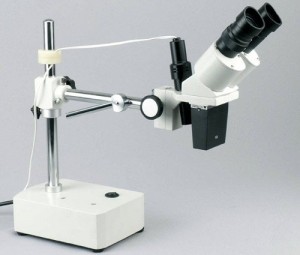
Stereo Microscope with a Boom Arm perect for scrimshaw
Stereo Microscope with a Boom Arm

This is a classic low-power microscope. The binocular 10X-20X stereo microscope on a boom-arm with a light gives clear sharp images. It’s widefield eyepieces, 45° inclined eye tubes and rubber eyeguards ensure an easy observation. The boom-arm stand allows you to turn the microscope head around two different axis (X and Z). This microscope offers high resolution, widefield of view and extremely large working distance (9″). The incident light shines down onto objects for the observation of surface details and fine scribing or stippling.

Available from Amazon.

Scrimshaw Tools – The Coulter Precision Scribe

Scrimshaw Tools – The Coulter Precision Scribe


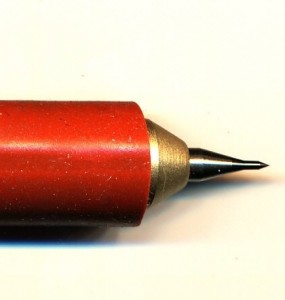
close-up of the Coulter scrimshaw scribing toolThe Coulter Precision scribing tool was first brought to my attention by Bob Hergert during an interview a couple of years ago.  Since then, I had hemmed and hawed, decided that my tools work just fine, and I can sharpen mine easily as opposed to a tungsten carbide precision point that would be next to impossible to sharpen with my rudimentary drills and stones.  This internal dialog kept me away from an excellent tool for a couple of years, and if I ever find myself alone in a dark alley… Save to say, I missed out on a couple of years with an excellent tool.  The precision point is not only excellent for stippling, but the lines you create have a nice deep “V” that holds the pigment well.  I’ll try to do a comparison of the different tools I use, if I can get a good enough picture setting it on “Super Macro” – but my photography skills are mediocre at best. As a scrimshaw tool, this is one of the best you can buy.

20170708 – Update:  Charles’ Etsy site is currently empty, but the eBay site is still active: http://stores.ebay.com/coulterprecision

You can find the Coulter precision tool on Etsy