This is a flash based collage made on VuVox showing the kraken from initial “wrap” to it’s latest incarnation. Far from complete, it’s interesting to see how it’s progressed over time.
Scrimshaw projects both current and past will be chronicled here
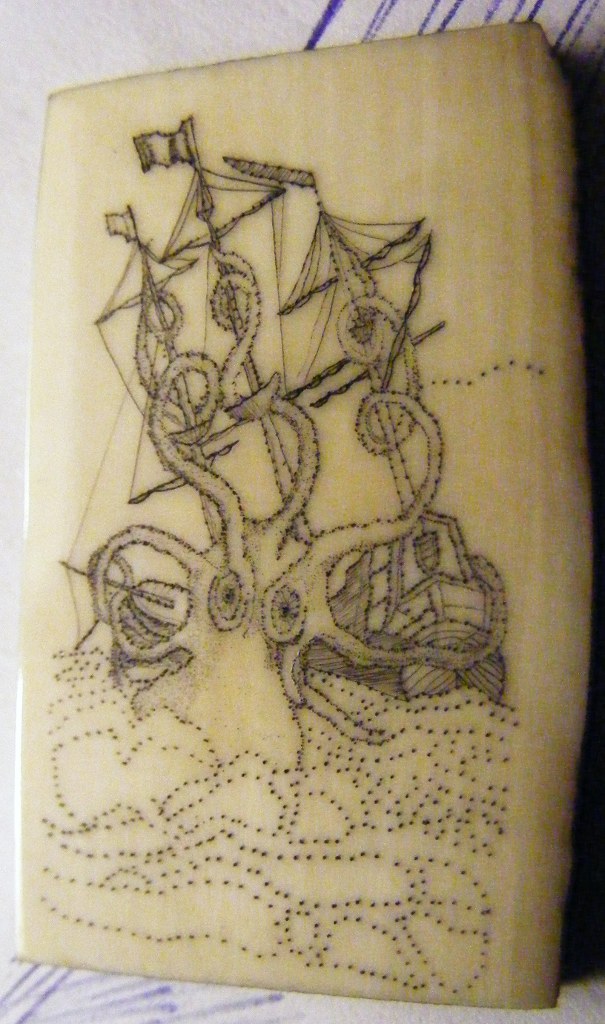
This is a flash based collage made on VuVox showing the kraken from initial “wrap” to it’s latest incarnation. Far from complete, it’s interesting to see how it’s progressed over time.

Finished the rat lines, started the waves. On the original, the waves were created as many fine lines for the dark water leaving areas blank for the white caps. The upper right where I started I scribed very lightly, and as I went across and down, I became more aggressive. The lower right is just about perfect, though I will have to work in the stipple dots to minimize their prevalence. The mid-left did not fill in very well, and I realized I was scribing them at an angle instead of straight up and down, so the oil paint wiped right out.

From this point the work will be balancing the light and dark, creating thicker lines and adding more stipple dots to shade “Squidward” – right now he’s looking a bit anemic when I look at the piece unaided by a magnifying glass. A looming question will also be how to present the piece once it’s done?

 Rat lines are the rope ladders the sailors use to climb up the masts to tie down, release and maintain the sails and rigging of a ship. On the hapless ship in this illustration, all of the sails were tied, showing many of the ropes and the arms (legs?) of the Kraken. Used the straight edge of a postcard to steady many of the lines and went freehand with the horizontals. While not in the original picture, the rat lines on our scrimshaw are being squeezed more firmly above the central crow’s nest. Filled in a bit more of “squidward” but I don’t want to further shade the head since the ocean has not been touched yet. Next step will most likely be completing the rat lines, then the ocean. Still unsure about the background – I had put the mountain horizon on the upper right, so either the mountains will be there or some clouds.
Awhile back, I had made some videos of creating a scrimshaw based on a dragon tattoo. This step by step video is broken into three parts.
How to Scrimshaw a Dragon – This is one of many ways of transferring your art to ivory. Here, we use a variation of the “graphite paper” technique.
Transferring Your Art to the Ivory – This is the technique taught by my teacher when we were using pre-embargo elephant ivory. I’ve kept this here because it is a starting point but recommend NOT slathering on the ink like it was peanut butter, and NOT rubbing off the ink with the folded cardboard! Instead, I recommend using a 000 brush to go over the lines if you are using ink, and a slightly dampened cotton ball once the ink is dry to remove the excess ink. Better yet is using oil paint, which we hope to switch to completely in our kits real soon.
Adding Color to Your Scrimshaw – The final step is adding color to your scrimshaw.
Adding more shading, you can see that in many ways, you are destined to work with the darkest(deepest) stipple-dots you created when you first began your piece. The initial dots were done with my original tool, just sharpened, while the subsequent work was done with the Coulter tool (see tools section). It will take a few more pieces before I am familiar with this new tool and can master it’s subtleties. with an angle of approximately 20 degrees going to an incredibly sharp and hard point, this tool will pierce paper effortlessly and create a dot on a piece of ivory with little trouble. Experience will allow a subtler initial stipple-dot so shading can be made more realistically. Click here for a larger view