Tag: scrimshaw

Mystery Artist 27 – Ring with “DCZ”

Mystery Artist 27 – Ring with “DCZ”

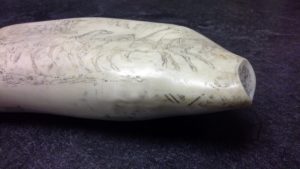
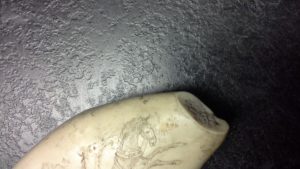
“… I have a ring I’m not sure of the material but IMystery Artist 27 Dragon Ring mystery-artist-27-2 mystery-artist-27-1 
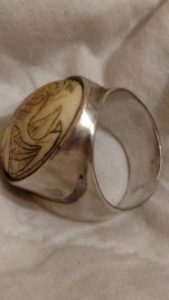
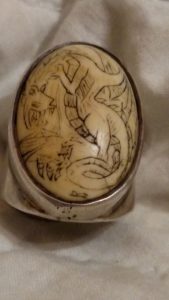
believe it to but a type of ivory.It is from what I can tell signed “DCZ”. Any information that can be determined would be greatly appreciated.Thank you -christian.”

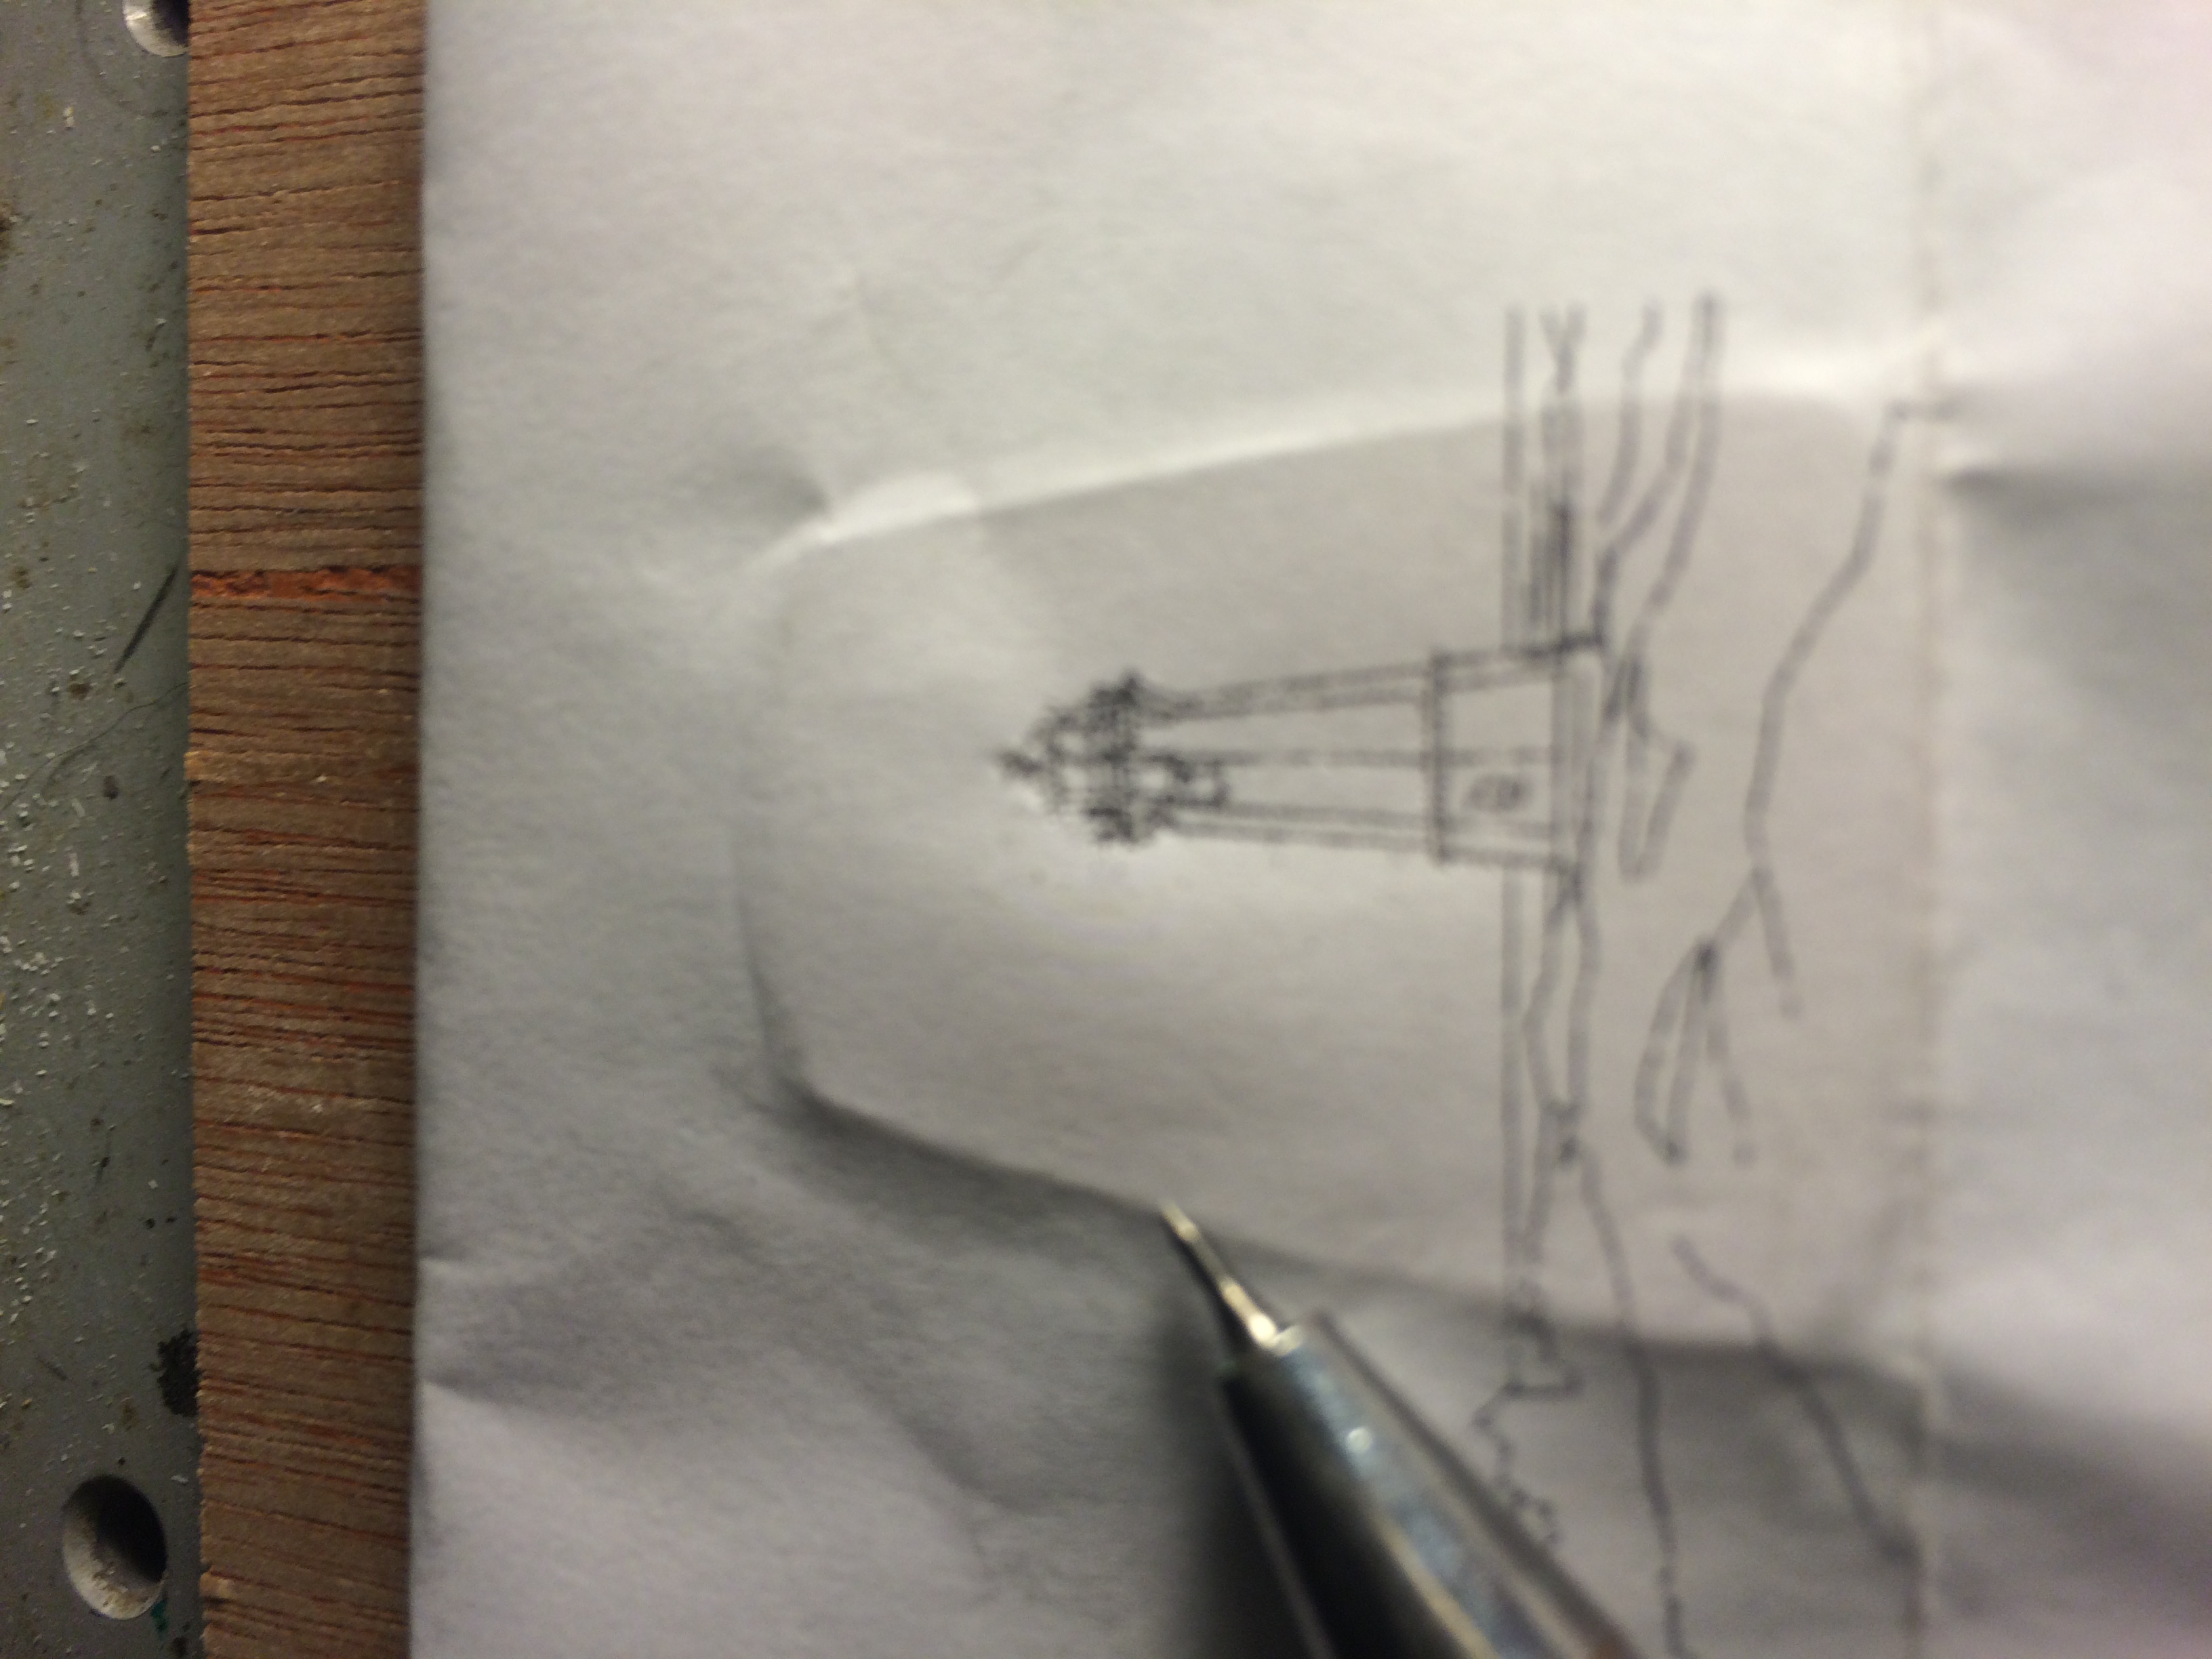
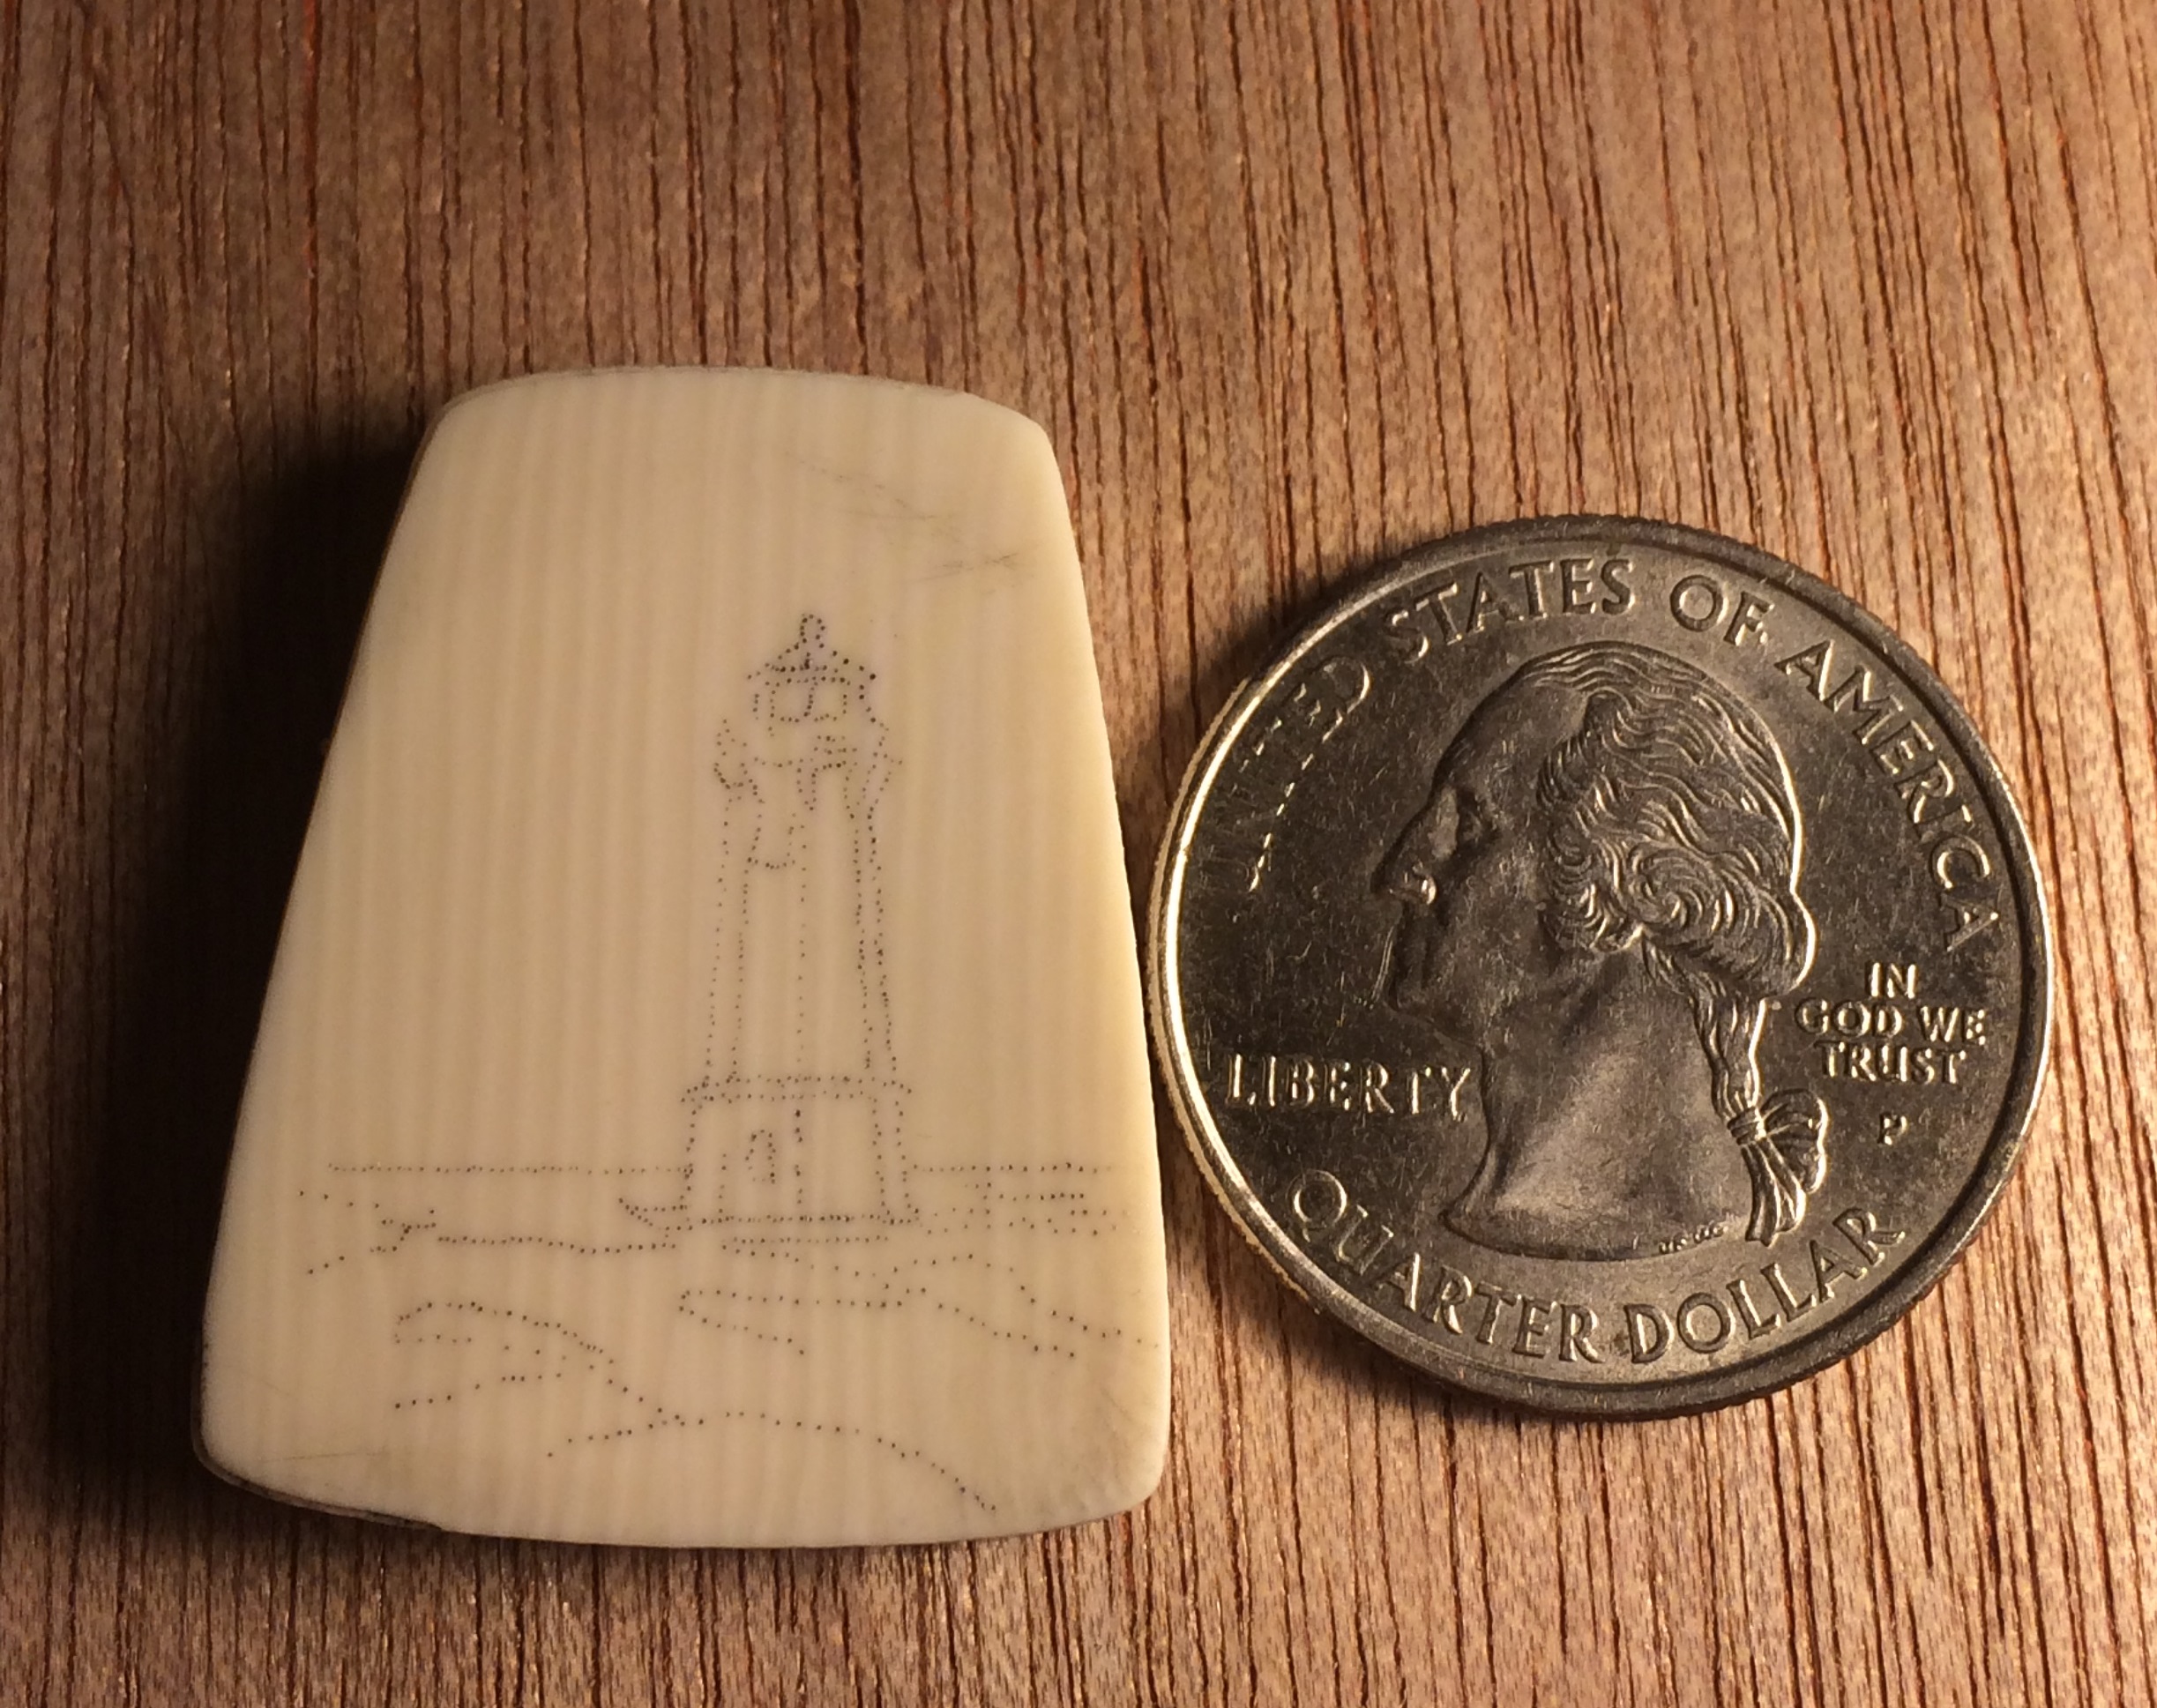
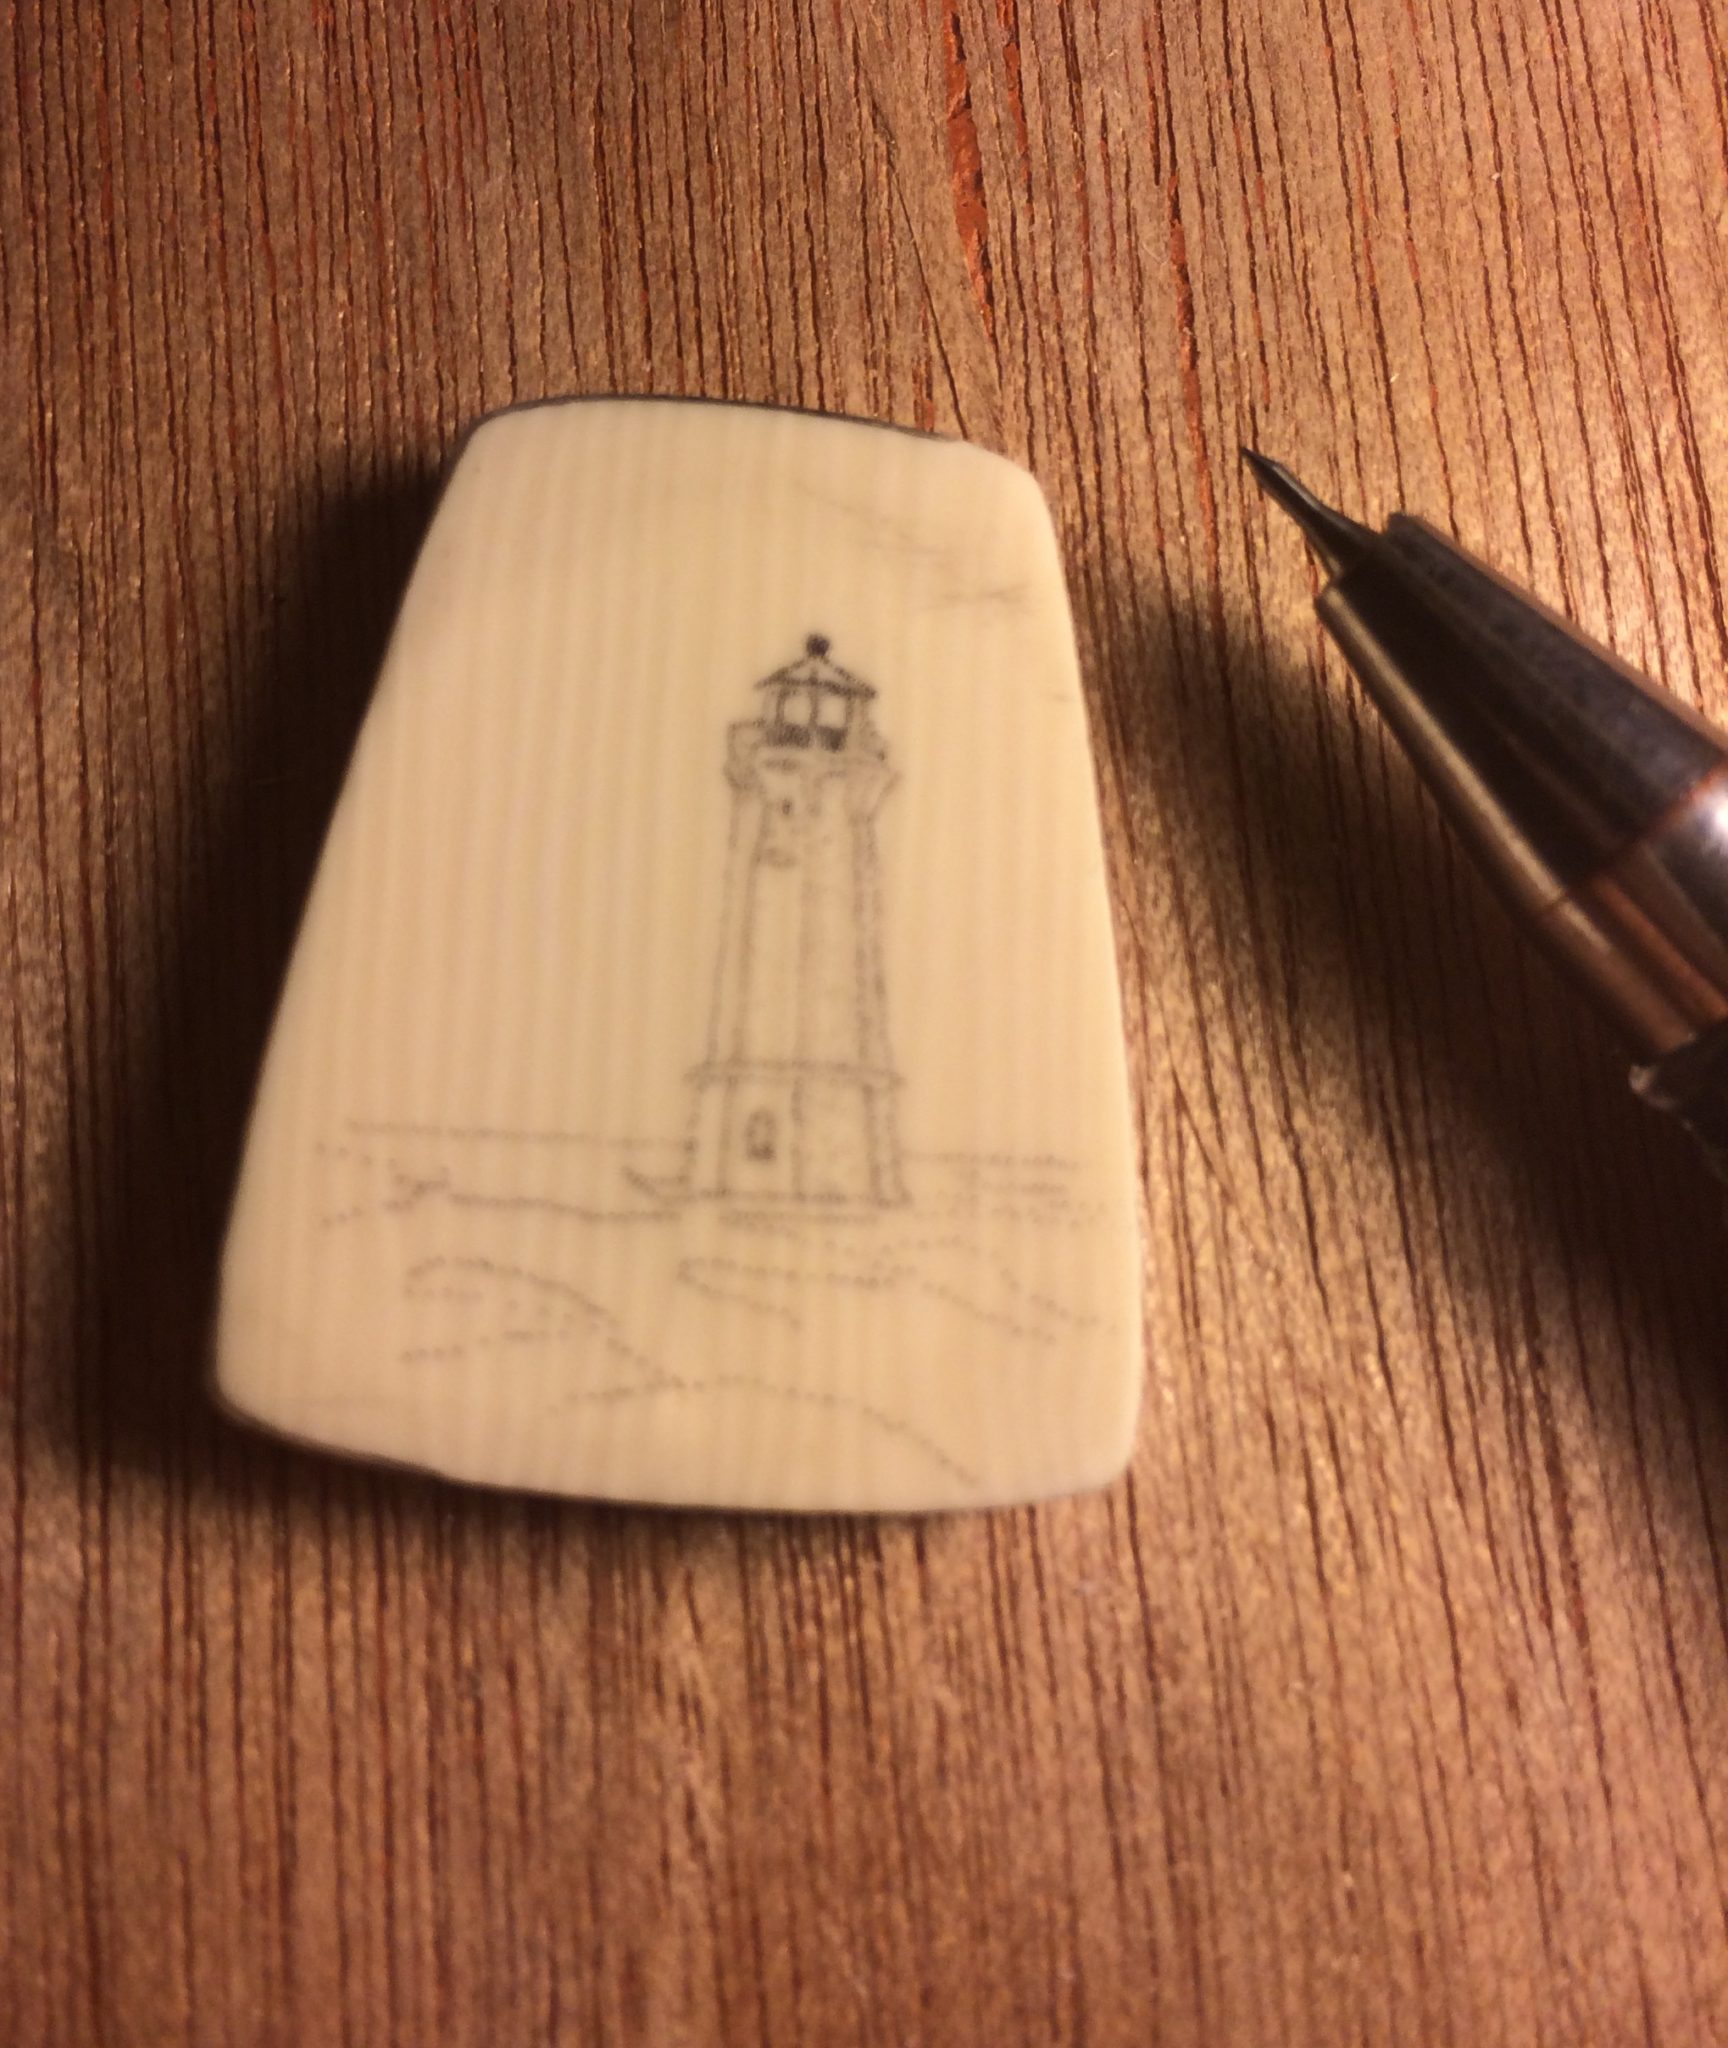
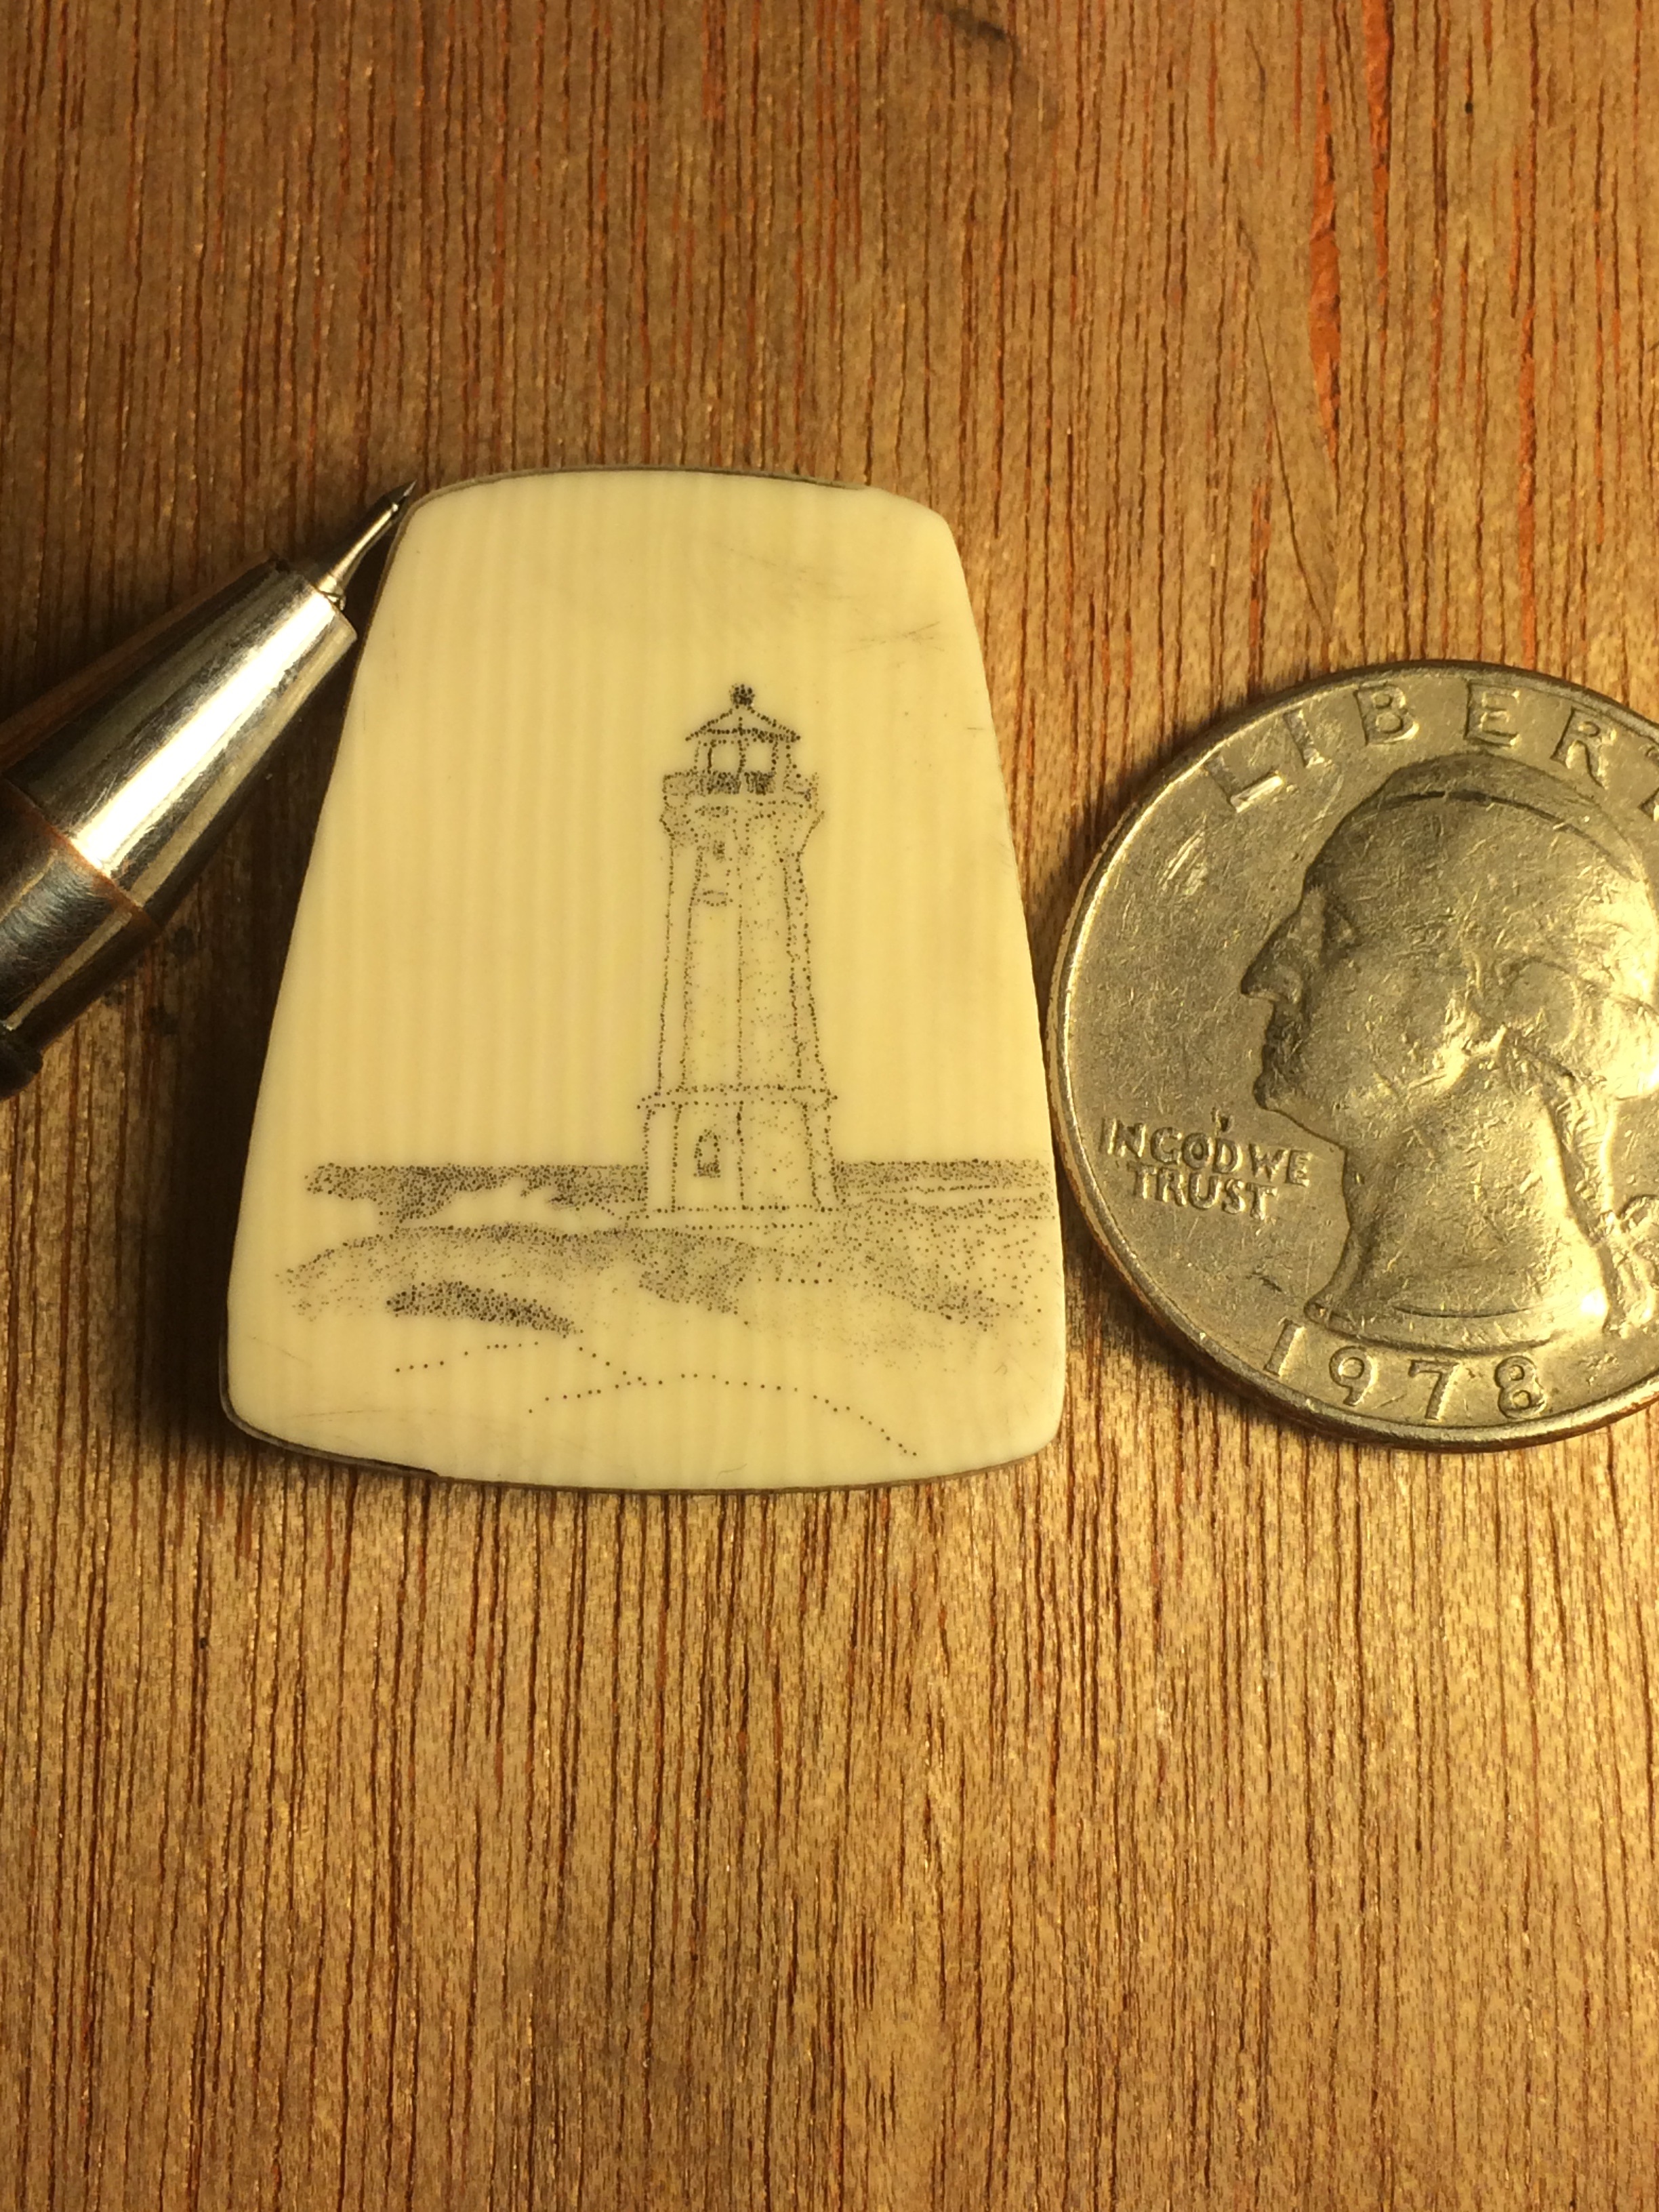
Looks to have a grain behind the dragon, but it’s difficult to tell.  Hoping to find more information as to the location it was purchased to help find the creator.  Anyone know a scrimshaw artist with the initials “DCZ”?  We’d love to know, there are few scrimshaw rings out there.  Add any information in the comments section below.

The Value of Scrimshaw

The Value of Scrimshaw

Color scrimshaw on whale's tooth "A Sailor's Life for Me""A Sailor's Life for Me" scrimshaw on whale's toothI’ve received a question regarding the value of a piece of scrimshaw done in the 20th century on a whale’s tooth, and I really don’t know the answer. I do scrimshaw, though I don’t collect it. A reader has a beautiful piece by P. Hayde, I believe, and wants to know how to figure its value so they may insure it. If there is a collector who could help them and similar collectors out with either a link or some good guidelines, I’ll be happy to post the information here, with or without your email as you see fit. It would be greatly appreciated.
Leave a reply in the box below to help your fellow collectors.

Thank you in advance,

Andrew Perkins

Mystery Artist 26 – Whale Tooth: Authentic or Repro?  Verdict: “Fakeshaw”

Mystery Artist 26 – Whale Tooth: Authentic or Repro? Verdict: “Fakeshaw”

Mystery Artist 26-1 Whale Toothe with crossed pistolsMystery Artist # 26 is a scrimshaw on a whale tooth, either real or a very good reproduction.  From the owner: “Hello, not sure what I have here, as it is somewhat similar to the Turnage Place Mississippi repros. Anyone’s help is much appreciated, thanks Kelvin.”

Mystery Artist 26-2 Whale Tooth with stagecoach

Mystery Artist 26-3 - Bottom edge

Mystery Artist 26-4 - Tip of the tooth

Mystery Artist 26-5 - Base of the tooth

One thing I’ve noticed is the uniformity of the color beneath.  There is also no grain in the bottom, which makes me think that it could be a polymer.  Two quick tests would be looking at it under a “black light”: if it glows, it’s definitely plastic. if not, it could still be a different polymer.  The second test would be the “hot pin test”: heating a needle to red hot and pressing the point into the base to see if it melts or burns, taking note of the smell.  If it smells like plastic, it is.  If it smells like a dentist’s office after a day of drilling, it’s more than likely ivory.

Anyone know the artist or the authenticity of this item?  Let us know in the comments.

Douglass Moody, a longtime scrimshaw collector responded below, reprinting his response here:
“This is a well-documented, mass-produced resin replica of a scrimshawed whale tooth, colloquially known as Fakeshaw. It is NOT a reproduction, because an authentic original never existed.”

Thank you, Douglass!


Brighten up “Reverse Scrimshaw” With This Technique

Lion "Reverse Scrimshaw" on water buffalo hornAfter doing several “reverse scrimshaws” – scrimshaw on a dark material where the stipples/incisions are filled with a white pigment, I found they looked kind of dull.  From experiments a couple of years ago using “Pearl-Ex”, I knew mixing it into the pigment only made a slight difference.

This time, I coated the surface with an acrylic paint (oil paint should work the same), then wiped it off while it was still wet.  With a Q-Tip, I lightly brushed some of the Pearl-Ex (micropearl – smallest white particles I was able to find) onto the surface then wiped it off so the particles would adhere to the wet paint in the stipples while the rest would wipe away.  It made a big difference no matter what angle you hold the piece now. Available at many local art supply stores and at Amazon.com (Pearl-Ex Micropearl)


Starting a New Scrimshaw

Starting a New Scrimshaw

Galalith cabochon taped behind the image of a lighthouse
Galalith taped behind the image


Finally starting a new piece of scrimshaw!  It’s been awhile, and I needed something away from most of the electronics.  With the phone in my back pocket and turned off so I don’t accidentally dial anyone (“Sorry, I fat – er – fingered the phone and hit your number….”). I started the lighthouse that I really liked by Dennis Jarvis (see previous post).  Sadly the crashing waves to the left are off the picture, but I may take artistic license and create similar waves closer to the lighthouse itself.

I debated on whether or not to sketch it on, but with such a tight schedule I opted for the “Whaleman’s Way” – putting the “tooth” shaped piece of galalith behind the picture, securing it in place and piercing through the picture.  After a few more pieces I’ll probably sketch something on a piece and go totally freehand.

lighthouse image on paper, pierced through the lines into the galalith underneath
Pierced Lighthouse

It doesn’t take a lot of pressure to get through and make an indentation. As you do more pieces you get a feel for the right amount. Most of my stipple-dots are pretty even, thanks in part to the modified Coulter Precision scribe (via Etsy).  I’ve tried a steel point with another project I’m working on, though the length makes it difficult to do perpendicular dots with my current low-power microscope (if anyone wants to buy me an opti-visor for Christmas, I’ll gladly call you Santa!).


Lighthouse stippled onto galalith cabochon next to a quarter
Lighthouse initial phase completed.

Wiping away a small smear of oil paint revealed not only the lighthouse, but a small scratch that will become a distant cloud when I’m done.  That’s all for tonight, back to the 12-14 hour days I currently call my week.  Will post further as the lighthouse takes shape.

Clicking on the pictures will reveal them in full size.


2015-11-01

Scrimshaw lighthouse on galalith with tool to the right
Roof and lines darkened

Darkened in the roof and lines, added some initial shading to the building itself.  May continue on as it’s cold and wet outside, and I need to take a break from the computer today.  My hands are doing better after decorating 50+ cookies for my daughter’s school’s “Men Who Cook” event.  My wife (who is the owner of hilltowncookies.com) needed help since she baked the cookies along with her mom and her hands ache more than mine making the cookies themselves. Piping the decorative icing on the cookies took about four hours, but they came out great.

Lighthouse scrimshaw on galalith with a quarter to the right to show the scale
Added some shading and started in on the shoreline.

Added more shading this afternoon and worked in the wave at the edge.  Note to self: don’t make the horizon line during initial scrim – I could have had larger waves crashing if I hadn’t done that. This is going to be one of those pieces where I will go over the whole thing several times darkening areas to add more detail, then darkening other areas to balance it.  It’s a good piece to get my hand and eyes back in shape, since I have a couple of large pieces coming up. I’m still debating on lines, stipples or a combination on the large piece, and I still have the Kraken ogling me to my left, so when I finish this one, he’s next!


Finally done, on a faux leather 20″ necklace.  Added the clouds and the seagull, all done in stipple style with the exception of the initials.  Now: on to the Kraken!

Lighthouse Done
Subtle clouds in the background and the ever-present seagull. On a faux leather necklace.