Category: Projects

Scrimshaw projects both current and past will be chronicled here

Nantucket Basket Topper on Casein

Nantucket Basket Topper with "Barbara" scrimshawed in the center of a floral ring
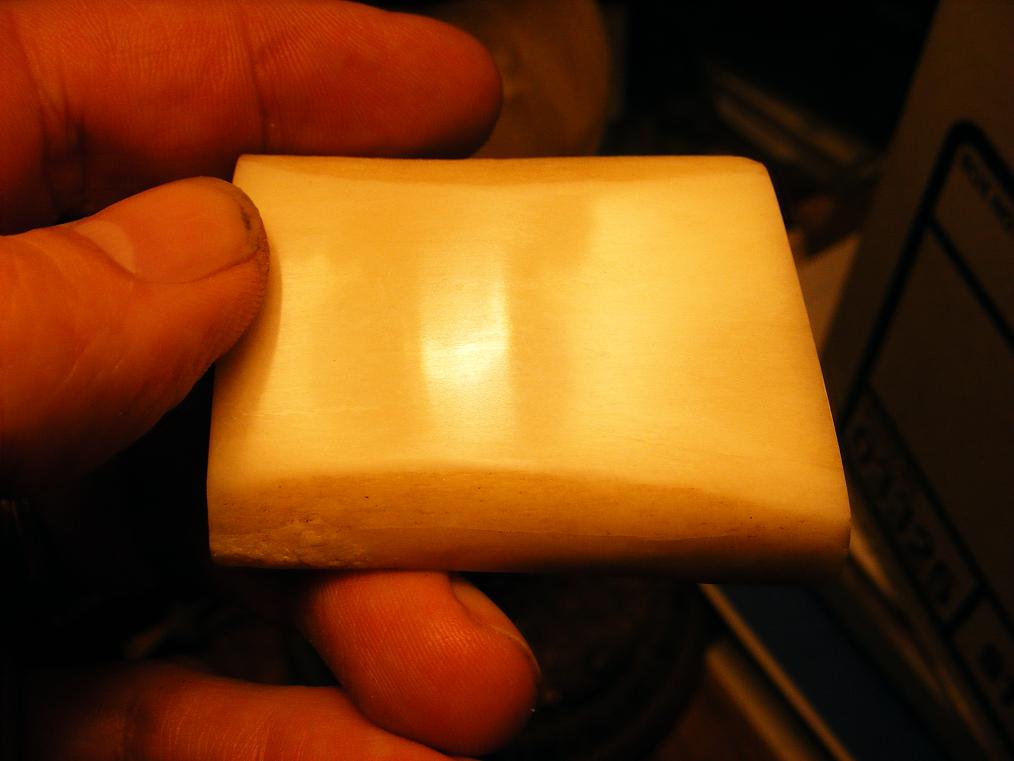
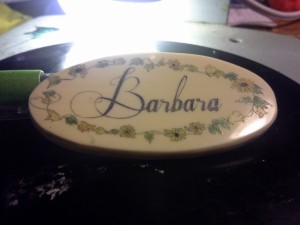
We finished and sent a scrimshaw Nantucket Basket Topper last week to a customer and wanted to share a picture of it here. We created this on a piece of casein, an alternative ivory from England which comes very close to mammoth ivory in most respects. It’s hard, not pliable like most plastic substitutes we’ve worked with as of late and scrimshaws very well provided you sand and polish it to a mirror finish. The customer requested yellow flowers other than roses, so we found several pics on Flickr of snapdragons and other wildflowers to base them on.  Three coats of Renaissance Wax protects it from dust and light abrasions. While they won’t need it for awhile, we also sent 1/2 dram of the wax along with instructions on how to apply it when they need to reapply it.  A little goes a long way – we’ve had our 65ml jar for over five years now and we’ just reached the 1/2 way mark.

We have a limited amount of this material for those interested in either creating their own Nantucket Basket Topper or having one created for them. Email “questions@scrimshaw.com” and let us know your needs, we’ll do our best to fulfill your needs.

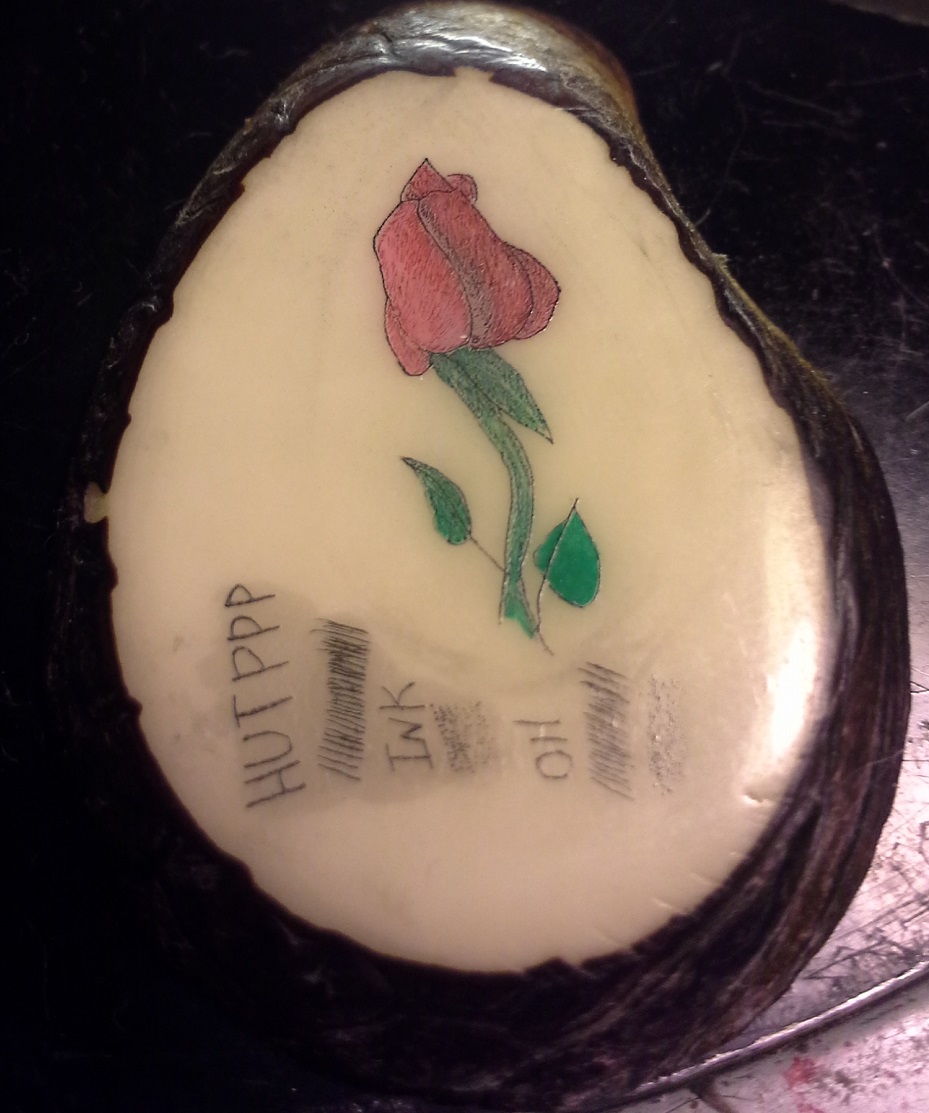
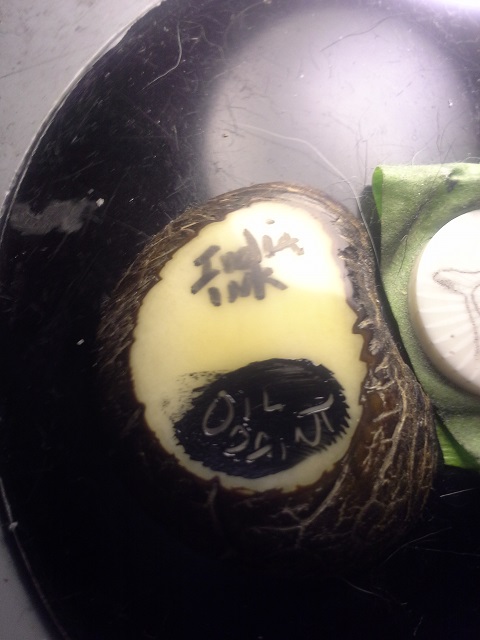
Anyone not familiar with Renaissance Wax should really become acquainted with it if they make any fine work with ivory or wood. We found after experimenting with it that it’s best to wipe it on with a soft cloth and let it sit and dry, preferably for several hours. Once it’s completely dry, using another cloth to wipe it off leaves a nice shine provided the material was polished to begin with, and will protect the ink in the incisions.  When we first tried it, we wiped it on then wiped it off, similar to shoe polish (which is what it smells like).  In some cases this lifted the oil paint we were using out of some of the finer lines, probably due to the fact that the paint was also not dry (the hurrier I go, the behinder I get).  Using it correctly on dry surfaces works wonders.


Check Twice, Drill Once (preferably from the front…)

Casein Scrimshaw drilled at the bottom by mistake
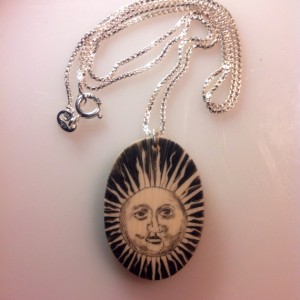
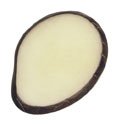
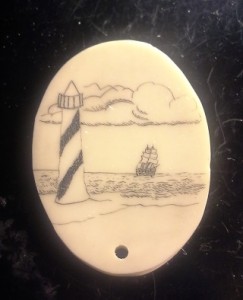
I was setting up the “Sun Motif” scrimshaw I had created on a casein cabochon and decided I should go ahead and drill the one-off light house to put on a chain as well.  Carefully measuring I marked the back and drilled a hole through – on the bottom.  Oops. Oh well, sour grapes, we’ll see how it holds up to a second sanding.


The sun came out better, checked and sure enough, I’d marked it at the bottom instead of the top.  Think drilling face-up should be my preferred method.

Sun motif scrimshaw on casein

Bone – An Abundant Ivory Alternative for Scrimshaw

Scrimshaw can be performed on any hard material that will hold a contrasting pigment.  Scrimshaw on bone handled knives as well as bone cabochons or beads are popular alternatives to ivory, and there are plenty of materials out there.

Bone is a naturally porous material which will take on moisture and oils as well as expand and contract with the variations in temperature and humidity. It is best to either find a stabilized source or to stabilize it yourself before you take the time to ply your craft.

Stabilized bone can be found in most knifemaker supply houses as either cow bone, camel bone or in some cases other “bush meat” bone that has been cleaned and preserved.

You can find blank material to work on in several places depending on your end product. Amazon has bone blank
bone knife scales from time to time, and there are also buffalo bone nut blanks often used in the luthier trade. You can sometimes find them oversized which works well for smaller knife handle material or for creating cabochons or inlay.

As to the material when it comes from the source, unless it clearly states that it has been or is stabilized, figure that it is not, and it will be porous.  There are several ways you can stabilize or seal them yourself, or you can re-ship them out to a stabilizing service – they often do the same for bone, antler, spalted wood, etc.

Stablilizing Bone for Scrimshaw – top coat:

  1. The first Method requires dry bone cut roughly or completely to the shape intended,
  • cyanoacrylate glue (super glue like Loctiteor Bob Smith 103 )
  • small paint brushes – don’t use good ones, get cheap ones you can throw away or use q-tips
  • Newspaper to cover the area you’ll be working on.
  • gloves
  • ventilation
  • eye protection

Coat the piece you intend to scrimshaw by squirting the glue on then coating the rest of the surface using the brush. Let the piece dry.

Once dry, sand it down lightly so it’s smooth. We tend to use 320 grit sandpaper then wipe off any dust and recoat it.  Second time we sand it we move up to a 600 grit and inspect it carefully.  Sometimes two coats is all you need to fill in any voids.  If it’s good, we work up to 3000 grit, then a polish with HUT wax and start to scrim.


bone blank slightly yellow
Stabilized bone after minwax vacuum immersion

Stabilizing Bone for scrimshaw – method 2: Immersion

We tried this using Minwax Wood Hardener and came up with useable but “antiqued” looking bone and tagua nut buttons.  They ended up with a yellowish patina.  In this method you’ll use a glass mason jar or ball jar with the vacuum type lid, you will be standing the jar upright and immersing your pieces in either the Minwax wood preservative or a mixture of acetone and duco cement as mentioned in http://www.artifactsguide.com/discus/messages/12/11427.html?1071787182

Either one should be done in a well ventilated area with no open flames sparks etc.  Realize also that any rubber or plastic (like the wine stopper and the lid) will disintegrate – wear gloves when removing it and discard appropriately.

I used a Vacu Vin, drilling a hole into the top of the metal ball jar lid that fit the stopper almost perfectly.

Jar mouth sealerAnother way to accomplish this would be to use a FoodSaver T03-0006-02P Regular-Mouth Jar Sealer which may last longer if you can remove it quickly enough.

Here’s a video of someone stabilizing some material similar to what we’ve just described:

https://www.youtube.com/watch?v=sx5BW-aAR1I

Here’s another one from another individual:

https://www.youtube.com/watch?v=-DfZXM2B51Q

Pre-stabilized bone can be found in cow, camel and giraffe, though many times it is died or “jigged” – where a pattern is cut into it to allow for a better grip. Texas KnifeMaker’s Supply has some nice supplies including cow,


Here are several links to knives you can scrimshaw. Most have bone handles from Amazon.com:

  •  Bone Handles Barlow
  • Magnum Damascus
  • Browning Folder


Quiet Sunday Morning Updates

Added a couple of pics to existing posts.

Buffalo scrimshaw on paper micarta in progressFinished Buffalo on Micarta next to quarter on left
The Buffalo on Paper Micarta is slowly ambling its way to completion as I experiment with textures. It is a medium that can capture lines far better than I first imagined, but it is still softer than ivory.

Update 5:00pm EDT  Decided to finish it off this afternoon after a frenzied camper dropoff.

Rose on Tagua Nut using Oil for the initial black and India Ink for the color. Test scribes below the rose
Added the final pic of the Tagua Nut Rose experiment, carefully inking the colors using India ink and a 000 brush. Like the effect but you have to be real careful with the ink.

Owl on Casein - finished
The “Merlyn’s Owl” is finished and the recipient is thrilled. Coated it with a final layer of Renaissance wax once it dried and sent it off.


Look into the comments section, too – have an inquiry for a husband and wife scrimshaw team that worked in Ohio in the 1970’s that an individual has asked about.  Preliminary search didn’t find them, hoping to get some pics of their work so we can put them up as a “Mystery Artist”.

Ivory Alternative: Tagua Nut

Ivory Alternative: Tagua Nut

A Renewable Resource You May Already be Wearing

tagua nut sliceTagua nuts have a varied history for the west, acting as a ballast medium for ships setting sail from South America*. This material has been popular for a long time as a substitute for ivory and has been making a comeback as a material for buttons and jewelry.  It’s also used for making carvings such as netsuke and other small adornments.  Tagua was used by the US Army during World War II for uniforms, gradually being replaced with plastics afterward.

What Is Tagua Nut?

Tagua nut is the seed of a palm known as Phytelipas Aequatoralis, it does have a distant cousin in the Solomon Islandsknown as ivory nut and Metroxylon amicorum from the Caroline Islands of Micronesia, as well as Hyphaene ventricosa from the Zambezi River of Africa*.  Tagua nut is the most plentiful and accessible. It is a dense seed that is dried then either cut or sometimes sanded and polished as is and can be found on Amazon.com.

As a wood, it is one of the densest around and inside, it has a challenging secret: there are almost always voids, so acquiring a tagua nut with the intent of slabbing it will end in a lot of waste and frustration.  On the upside, you can get them pre-cut with slabs or “potato chips” in thicknesses from 1/8″ to almost 3/8″ (3.2mm to 9.5mm).

Scrimshaw and Tagua Nut

Tagua nut polishes to a high luster and looks like a great substitute at first, and can be as long as you follow a few guidelines:

  • Sand and polish to at least 3000 grit starting at about 150 grit, first in one direction, then perpendicularly when you move to the next finer grit (up and down for 150 grit, back and forth for 300 grit, up and down for 600 grit, etc.)
  • Let it sit between steps for at least one day.  Sanding to about 1000 grit  will heat the wood making it expand slightly. If you are using machines it will probably heat it up even more (we always rough sand flat, wait a day, then progressively sand to 600 grit, wait one day, then do the final sanding to 3000 grit).
  • As you will see, HUT Wax applied with a felt wheel has given us the best results so far (yes, wait one day, polish, wait one day, then scrim)
  • India ink has a tendency to stain, using oil paint and wiping it off wet is the best way to make your scrimshaw appear.
  • Scrimshaw everything first – repeated coatings of pigments will get under even some of the best coatings and stain the micro-pores within the tagua nut. This can be tricky if you’re first starting out scrimshawing, but it will yield the best results.

A fine (000) paint brush and careful application will allow you to fill in darker areas but at this point you will need to paint carefully and let the paint dry completely, don’t try to wipe it off, since you can’t repolish once you’ve scrimshawed.

Another way around the micro-pores issue is to send your material out to have it stabilized, or stabilize it yourself.  There are several YouTube videos that show people stabilizing their own using vacuums and MinWax wood restorer.  We tried this and found the distillates disintegtrated the latex seals quickly making a sticky smelly mess (it did take a couple of days for this to occur, it wasn’t minutes), and the creamy white tagua nut turned an antique yellow.  We’ll continue to experiment, but you may also want to try sending some samples to businesses that specialize in stabilizing wood and antler.

One other idea that looked good on paper that didn’t work was to spray the tagua nut with spray varnish.  This left a film that was difficult to scrim, peeled, and ended up unsuitable.

Summary

Tagua nut can be a good eco-friendly substitute for ivory as long as precautions are taken and a commitment to scrimming once, then patiently rescrimming and only filling in the re-scrimmed areas with a small brush.

Tagua nut with India ink (top) and oil paint (bottom) applied with no scrimming
The same tagua nut that India ink and oil paint were on, wiped it away. The India ink left a stain.
Wiping away after the ink dried (the oil paint still wet) the India ink left a stain.
Polished tagua nut (center), HUT wax bar (top) and dremel felt wheel (bottom left)
Second tagua nut sample polished and buffed with HUT Wax, then left to sit for one day.


"OIL" scribed into tagua nut and oil paint applied then wiped away.
Tagua nut polished with HUT wax under a microscope after wiping away oil pigment.
Tagua nut under the microscope after polishing with HUT wax and india ink applied to the scribe lines. The ink penetrated the tagua creating a stained area.
Clicking on the picture will show you the staining in the micro-pores of the tagua nut by the India ink
Rose on Tagua Nut using Oil for the initial black and India Ink for the color. Test scribes below the rose
Rose on Tagua Nut using Oil for the initial black and India Ink for the Color